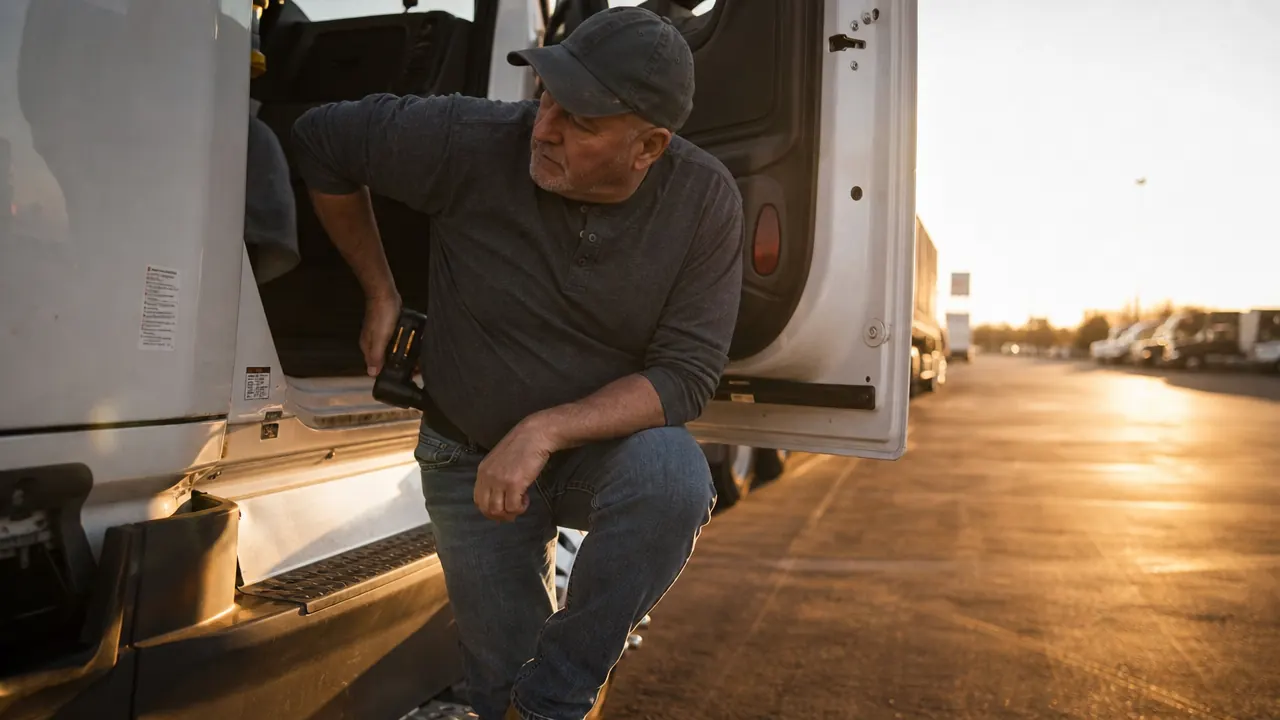
If you get out of the cab and your lower back is locked up, your hips feel like rusted hinges, and your glutes have been sitting on a hard seat for ten hours straight, you already know the problem. A massage gun can help. But only if you use it on the right spots, with the right attachment, for the right amount of time. Use it wrong and you either waste five minutes feeling nothing, or you bruise yourself up and swear off the thing for good.
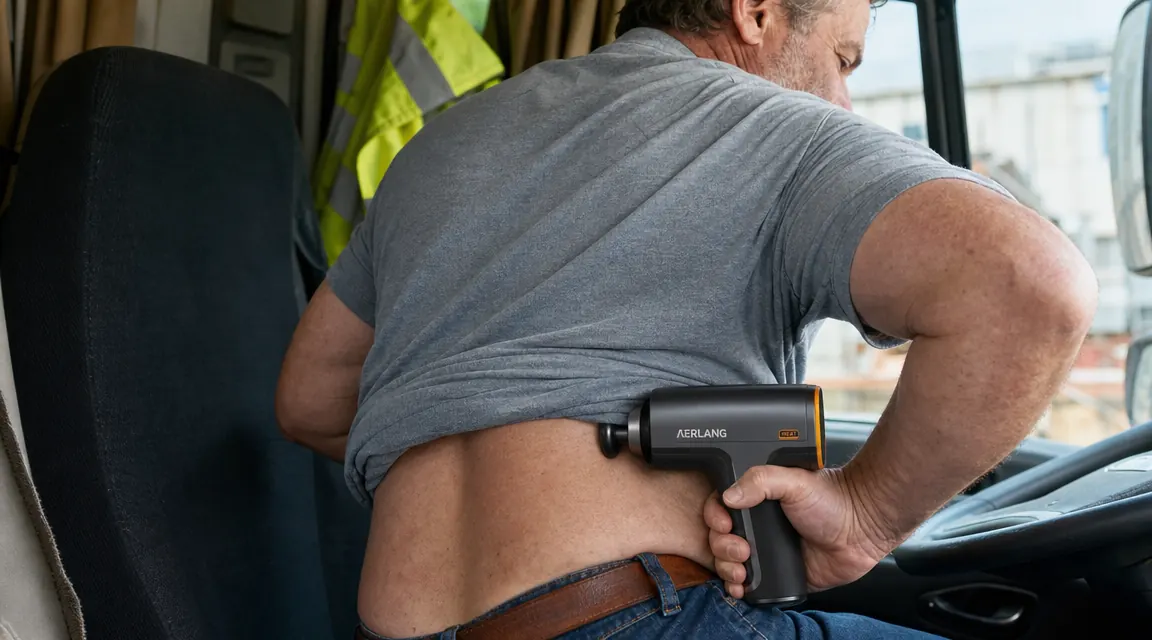
I drove over-the-road for 30 years. I tried heat pads, foam rollers, stretching routines, and three different massage guns before I figured out a sequence that actually makes a dent in post-shift lower back and hip pain. The tool I come back to every time is the AERLANG Heated Percussion Massage Gun. The heat attachment is the differentiator for lower back work specifically. Cold percussive massage on a locked-up lumbar can feel jarring. Heat plus percussion gets into the muscle faster. Below is the exact protocol I use, in order, with one safety note before we get into it.
Your lower back has been compressed all day. Give it ten minutes before you lock it in for the night.
The AERLANG Heated Percussion Massage Gun combines percussive therapy with a heated attachment head designed for the lower back and hips. Over 21,000 reviews on Amazon and a 4.4-star rating. Ships Prime.
Amazon Check Today's Price on Amazon →One Safety Rule Before You Start
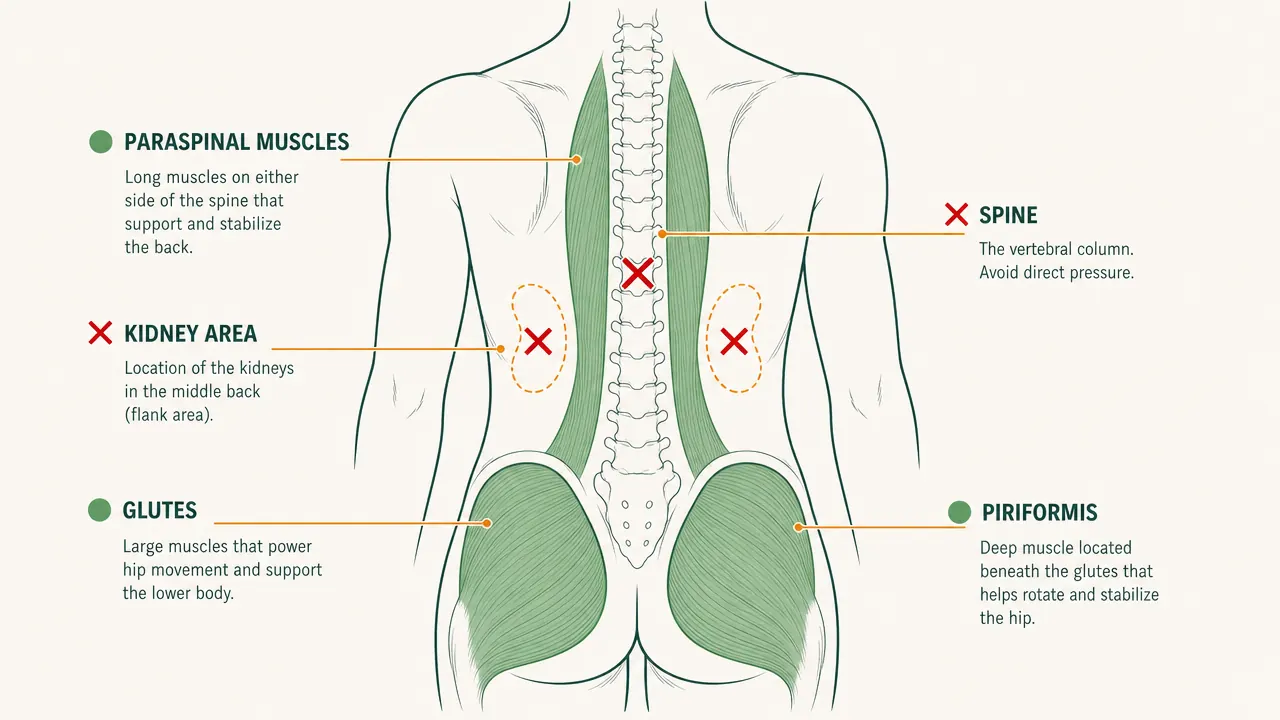
Do not put a massage gun directly on your spine. That means the vertebrae themselves, the bony column down the middle of your back. The percussion heads are designed for muscle tissue, not bone, and running one directly along the spine can cause nerve irritation or bruising. Same goes for the kidney area, which sits in the soft flank of your middle back, roughly at waist level on both sides. Avoid that zone entirely. Everything I describe in the steps below stays on the muscle groups that flank the spine and the hip structures. If you have a diagnosed disc injury, spinal stenosis, or were recently told to avoid deep tissue work by a doctor, check with them before using any percussion device on your lower back.
Step 1: Choose the Right Attachment Head
The AERLANG comes with six attachment heads. For lower back and hip work you want either the flat head or the heated head, not the bullet or the fork. The flat head spreads pressure across a wider surface area, which is better for the broad paraspinal muscles on either side of your spine. The heated head does the same job but adds warmth, which helps a cold, locked-up lower back loosen faster. Save the bullet tip for spot work on a single trigger point in your glute or piriformis, but only after the area is already warmed up. The fork attachment is for the neck. Leave it capped for this session.
Start with the heated head if you are coming off a long shift and the lower back feels stiff and compressed. Start with the flat head if the area feels more tender than stiff. Tender means the muscle is already inflamed; you want less heat and lighter pressure in that case. If you are not sure, go flat head first and see how your body responds in the first two minutes.
One practical note: the AERLANG heated head takes about 30 seconds to warm up after you power on the heat function. Turn it on before you get into position so the head is actually warm when it contacts your skin.
Step 2: Work the Paraspinal Muscles First
The paraspinal muscles are the two columns of muscle that run on either side of your spine, from your tailbone up to your shoulder blades. After a long drive they are usually the tightest structure in your lower back. These are the muscles doing most of the work keeping you upright in a seat, and they cramp up when you hold one position for hours.
Set the gun to speed 2 out of 4 or 5. Position the flat head or heated head on the left paraspinal column at belt level, about an inch and a half to the left of your spine. Let the gun rest there with light pressure, maybe three to four pounds, for 20 to 30 seconds. Then move it slowly upward toward the mid-back, staying parallel to and clear of the spine. Work the left side top to bottom, then switch to the right. Each side should take about 90 seconds. Do not press hard. You are not trying to dig deep on the first pass. You are telling the muscle it is allowed to release.
If you hit a spot that makes you flinch or brace, that is a trigger point. Park the gun on it for 10 to 15 seconds with very light pressure, then move on. Do not hammer it. Sustained light contact releases a trigger point more reliably than aggressive pressure.
Step 3: Move to the Glutes and Piriformis
For anyone who sits for a living, the glutes are probably the most neglected recovery site on the body. When you sit, your glutes are compressed and switched off for hours. The piriformis, a small muscle that runs diagonally across the middle of your glute, is a common source of sciatic pain in drivers because it sits directly over the sciatic nerve. When it gets tight, it can pinch that nerve and send a line of pain down the back of the leg.
Switch to the flat head for this area. Sit on the edge of a firm chair or on the floor with one knee up. Work the gun across the full glute muscle with slow strokes, staying away from the tailbone and the hip socket. When you get to approximately the middle of the glute, slow down and probe gently. If you find a spot that refers pain or tightness down the back of your leg, that is likely the piriformis. Spend an extra 20 to 30 seconds there at low speed with minimal pressure. Do one side, then the other. Total time for both glutes: about three minutes.
The piriformis is a small muscle but it causes big problems for drivers. Two minutes of light percussion work on it three nights a week made more difference for my sciatic tightness than anything else I tried.
Step 4: Hit the Hip Flexors on the Front Side
Most people skip this part, and it is a mistake. The hip flexors, primarily the iliopsoas complex that runs from your hip down the front of your thigh, are in a shortened, contracted position every minute you are seated. After a full shift they are effectively locked short. When the hip flexors are tight they pull your pelvis forward into an anterior tilt, which compresses the lower back. If you only work the back side of the lower back and skip the hip flexors, you are fixing half the problem.
Lie on your back or stand with your weight on the opposite foot. Use the flat head at a low speed, speed 1 or 2. Work the upper front of the thigh just below the crease of the hip. Move slowly side to side across the front of the hip. Keep pressure light here. The hip flexor area is more sensitive than the glutes, and you are right near several major blood vessels. Light percussion for 60 to 90 seconds per side is plenty. You are not trying to dig deep, just encouraging blood flow and signaling release.
Step 5: Finish With a Two-Minute Slow Cool-Down Pass
Drop the gun to its lowest speed. Go back to the paraspinal muscles on both sides and do one slow, low-pressure pass top to bottom on each side. This is a flush pass. The goal is to move blood and lymphatic fluid out of the tissue you just worked, not to continue digging. Think of it like the cool-down lap after a run. It takes about two minutes and it makes a real difference in how sore you are not the next morning. Without it, you can leave the session with blood pooled in the worked tissue and wake up feeling bruised even when you used good technique.
After the flush pass, stand up slowly and take 30 seconds to do a slow pelvic tilt stretch, tucking your hips under and releasing a couple of times. The combination of percussion and a simple stretch locks in the release. Drink a glass of water. You just created metabolic waste in those muscles and your system needs fluid to clear it.

What Else Helps
The massage gun handles the muscular side of lower back and hip pain, but it is not the whole answer. The other piece most drivers skip is lumbar support during the drive itself. If you are sitting in a stock seat without any lumbar support, your spine is grinding into a flexed position for hours, and no amount of percussion work after the fact fully undoes that. A decent lumbar support pillow behind the lower back during the shift means you arrive with less compression to undo.
Heat between shifts also helps. A simple plug-in heating pad on the lower back for 20 minutes while you are resting is vasodilation without any mechanical work. It pairs well with the percussion routine because heat opens the blood vessels and makes the tissue more receptive. If you do heat first and then the massage gun, the gun works faster. If you use the AERLANG's heated head, you can skip the separate heating pad and combine both in one session, which is part of why I prefer it over standard percussion-only guns for this kind of recovery work.
Consistency is what actually changes the baseline. One session after a hard shift gives you relief tonight. Three sessions a week for four weeks starts to change how tight your lower back is at the start of each shift, not just the end. If you are dealing with chronic lower back tightness from years behind the wheel, you will not undo that in a single session. But two weeks of daily ten-minute routines will produce a noticeable shift. Most people I have talked to report that by week two they are climbing out of the cab without that familiar full-back lock-up. That is the real goal.
For more background on why percussion massage is particularly useful for drivers compared to other recovery tools, see the full article on the top reasons truck drivers and warehouse workers benefit from a massage gun at this link: 10 Reasons Truck Drivers Need a Percussion Massage Gun. And if you want a detailed breakdown of the AERLANG itself, including battery life, noise level at each speed setting, and how the heat function holds up over time, the long-term review covers all of that: AERLANG Heated Massage Gun Review.
Ten minutes after the shift. That is all it takes to stop tomorrow from starting worse than today.
The AERLANG Heated Percussion Massage Gun is what I use for this exact routine. Heated attachment for the lower back, six heads total, five speed settings, quiet enough for the sleeper berth. Rated 4.4 stars across more than 21,000 Amazon reviews.
Amazon Check Today's Price on Amazon →